Sound familiar? Is impatience a barrier to your creativity? Should it be? I say: "HELL, no!" I've learned to work around this temperament with "1-2-3 Projects," inspired little adventures that generally take few materials and less than an hour of hands-on work time, for the clever gal (or guy -- ain't no judgments here) on the go.
 Our garden is a mishmash of planning and letting nature take its course. When we viewed what would become our house last October, the bricked-in garden beds were one of our first attractions. The layout is such that some beds receive direct sun, some mostly shade. That plus built-in drip irrigation sealed the deal -- here we would plan the herb, flower and vegetable garden of our apartment-bound Brooklyn dreams, desert conditions be damned!
But Arizona gardening will turn your head, your instincts, and -- if you're not careful -- your pocketbook inside out. In Phoenix, there are two short growing seasons each year. Very little of it (except citrus season, which falls between the growing seasons -- stay with me here) makes ANY logical sense to those from temperate zones. Planting calendars and charts are very popular in this town -- and you'll still scratch your head from time to time when you're doing things like...oh...planting tomatoes in January.
Being the impatient folks we are, we paid a gardener to help us clear our old beds, trim some plants, and get a few things going in our herb garden. In November. Which we found out is generally not the time to do such things as frost, believe it or not, is still very much a concern during desert winters.
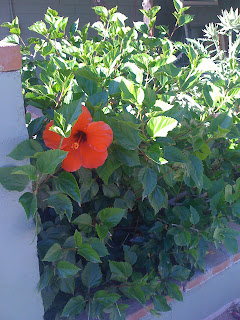 This past winter turned particularly chilly, with two very late and extended frosts that led to many locals complaining about the bitter temperatures (boo hoo -- we got down to the upper 30s/lower 40s at night...I know, I know) and killed many hibiscus, bougainvillea, and other beautiful flowering plants around town. We ended up hacking back six gorgeous hibiscus bushes and all of the bougainvillea, most of which have rebounded in astonishing ways. Mere stumps only three months ago (and I truly gave them up for totally dead), the hibiscus around our house are perfect examples of Mother Nature gettin' down and kickin' some serious booty.
Despite tucking in the garden at night with blankies, sheets and lullabies, we lost quite a few plants. But we also discovered what would rebound and what you couldn't kill with a nuclear strike. It turns out Mediterranean plants and herbs (except basils) are very hardy -- and lucky for us, perfectly suited to the desert if you happen to have drip irrigation.
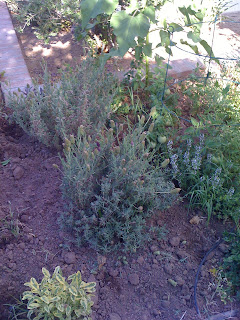
This spring -- and by "spring" we mean "February through April" out here -- four impressive, frost-resistant Spanish lavender bushes joined the blossoming orange trees and filled our backyard with color, scent and bees as other herbs started their season. Now at the end of May, most of the lavender heads have gone a greenish-gray, still full of scent but clearly at the end of their cycle and in desperate need of a trim to prevent them from crowding out the leafy herbs and tomatoes that are now coming into peak season.
Therefore, today's 1-2-3 Project: Lavender Oil! This one's a two-parter -- about 15 minutes in the first part and 15 minutes for the second part, about a week later.
You will need:
- About a quart of plain, good-for-your-skin oil. I grabbed a big bottle of sweet almond oil at the health food store and combined it with two smaller bottles of plain jojoba and Vitamin E oils I had sitting in the back of my medicine cabinet. Use up and combine what you have, so long as it isn't rancid. By the way, mineral ("baby") oil or anything else petroleum-based is not your best bet here.
- A clean, quart-sized mason jar, with tight fitting lid. By the way, I think mason jars are it. You can get a dozen of them for practically nothing at the grocery store and use them for so many things, including bargain drinking glasses. People will think you're totally hip and down-home when you're really just cheap and desperate for something to hold a large amount of booze for your pals. How about that!
- Two huge handfuls of fresh-cut lavender. Don't have lavender? What do you have in your garden that smells delicious? Mint? Rosemary? Sweet peas? Take a second and follow your instinct. Don't have a garden? How about using up those $4-per-package herbs that are wilting in your fridge and the cut flowers on your table? Recycling is fun.
- A high-speed blender or food processor. Or a really sharp knife and cutting surface will do.
- A chopstick or long-handled spoon, for stirring.
- A wire-mesh strainer, cheesecloth, a bowl, and a funnel, for final bottling.
- Rinse your lavender (or herbs -- it's your show, tonight!) and gently pat dry so you don't crush the leaves and waste all the natural oils.
- Throw the lavender into the blender or food processor with about 2/3 of the oil you plan to use. Whirr away until it's a fairly fragrant if ugly slurry. Alternatively, chop up your lavender into small bits, throw it in the jar with the oil, and proceed (FYI, you may need to let your oil sit longer than a week if you use this method).
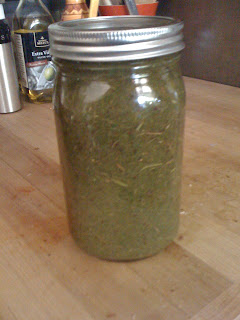
- Pour into your clean mason jar and add the remaining oil, making sure to leave about 1/4 inch of air at the top. Carefully stir to combine and tightly screw on the lid.
*~*~*~*~*~*~*
- Let sit in a cool, dark place for about a week -- or until the oil is the strength you like. Give it a little shake every day or so. Not strong enough? Let it sit (or add more lavender). Too strong? Hang on.*
- Line your strainer with two layers of cheesecloth and place it over a bowl. Carefully pour the lavender oil slurry into the strainer and gently press it down to separate the oil from the lavender bits. You can also gather up the cheesecloth and wring it to get even more oil out. N.B.: you may want to do this in two batches.
- Funnel the oil back into the rinsed out and dried mason jar, clean decorative bottles, or even the original bottles that the base oils came in (you saved those, right?) -- you can easily wash off the original stickers and slap on groovy new labels in their place. The perfect gift! Store in a cool, dark place to keep the oil fresh.
How can you use your lavender oil? All of the traditional bath and moisturizing uses, of course, but try these ideas:
- Place a few drops on a Kleenex or small cloth and tuck it into your bag or a drawer.
- Decant a tablespoon or so into a small bottle and take it with you on your next trip for a little pre-arrival pick-me-up.
- Fill a spray bottle about 1/8 full with the oil and the rest with distilled water, shake, and you have a refreshing linen and/or facial mist (keep it in the fridge during the summer -- chilly divinity!). You can also add a drop or two of your favorite essential oils to create custom blends.
No comments:
Post a Comment